101 Cooking For Two - Everyday Recipes for Two

Sunday, August 18, 2013

How to Grill an Excellent Hamburger - A Tutorial

How to Grill an Excellent Hamburger - A Tutorial from 101 Cooking For Two
An excellent burger and it is oh so easy if you know the secrets.

If your an accomplished griller, just move on... This is a tutorial for newbies and those who just can't seem to get it right. This is not the gourmet burger. I'm not grounding meat. I'm not stuffing the burger and I not mixing things in. We are going to learn to grill store bought ground beef and make a darn nice meal easily in a way you don't have to keep looking back at a recipe. How is that for a goal?

Click to Read More and Get Recipe

Labels: , , ,

Saturday, July 27, 2013

How to Grill a T-bone or Porterhouse Steak - A Tutorial

How to Grill a T-bone or Porterhouse Steak - A Tutorial from 101 Cooking For Two
How to cook a t-bone steak seems to be a problem for a lot of people. Well here is an easy never fail method. You can be the "grill master" too and have an excellent grilled steak in 10 minutes every time.

Click to Read More and Get Recipe

Labels: , , ,

Thursday, June 27, 2013

How to Make Potato Chips

How to Make Potato Chips from 101 Cooking For Two
Homemade potato chips. How does that sound? Make your own crunchy goodness in just a few easy steps. Come along and let me guide you with pictures.

You only need  a couple of potatoes, some oil and a little salt to have everybody thinking you are a kitchen wizard.


Click to Read More and Get Recipe

Labels: , , , ,

Sunday, June 23, 2013

BBQ Grilled Butterflied Whole Chicken

BBQ Grilled Butterflied Whole Chicken from 101 Cooking For Two
Great taste and crispy skin in a classic grilling. You too can grill a whole chicken and get it done just right.

There are a lot of articles about grilling a butterflied chicken but most grill amateurs won't try it. I'm here to tell you it is easy and it works.

Click to Read More and Get Recipe

Labels: , , , ,

Friday, May 31, 2013

Grilled Chicken Tenders

Great Grilled Chicken Tenders  from 101 Cooking For Two
An extremely easy moist and tender fingers... For the kids or the kid in you.

Do you have one of "those" kids? You know, the one who won't eat what you cook and you end up doing something separate and almost always unhealthy. This is the solution. Minimal work, time and guaranteed to calm that 3 year old dinner monster. You have steak, they have healthy chicken tenders.

Click to Read More and Get Recipe

Labels: , ,

Friday, May 24, 2013

How to Cook Corn on the Cob - Three Easy Methods

Three easy corn on the cob recipes  from 101 Cooking For Two
It's corn on the cob season. Here are three easy ways to enjoy this great side dish. Grilled corn on the cob, microwave corn on the cob or oven roasted corn on the cob... your choice.

As an Iowan, I claim genetic superiority in all things corn. You will love all three methods. I have published all of these before but this is your Spring reminder.

Click to Read More and Get Recipe

Labels: , , ,

Sunday, November 11, 2012

How to Brine a Turkey

A flavorful brine for your holiday turkey that will add a lot of moisture and taste to the bird.

Thanksgiving means turkey in our family and not a deep fried one. We are traditional so we are talking an oven roasted bird here. For many years we bought the "American classic" frozen bird that all the stores sell. You know... the "self basting" ones. Thaw it, butter or oil it up and stick it in the oven. That really does work quite well for "challenged" cooks out there. I give it a 4/5 stars in taste but a little dry at times and a 2/10 for skills needed. Add some gravy and sides and you have a very nice holiday feast. (See my "How to Make Gravy" post if needed).

BUT...you want to kick it up a few notches or you wouldn't be reading this. So let's MAN UP and get to it.

Click to Read More and Get Recipe

Labels: , ,

Friday, July 20, 2012

Easiest Corn on the Cob

DON'T SHUCK THAT CORN...There is no easier method, just toss them in an oven. Microwave or regular oven... either will do. No husking the corn. Just toss them in.  It's just a matter of seating the timer.

Click to Read More and Get Recipe

Labels: ,

Sunday, December 18, 2011

Easiest Crock Pot Shredded Chicken

Here is the ultra simple way to make shredder chicken for anything. Mexican, BBQ and any number of other uses. The idea and pictures are by my daughter Christine at 15 Minute Beauty Fanatic. You just dump it in slow cooker with some broth and spices.

Click to Read More and Get Recipe

Labels: , ,

Saturday, October 8, 2011

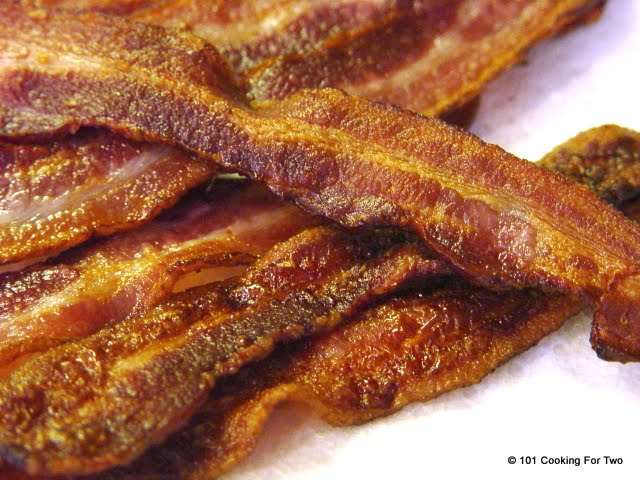
How to Cook Bacon in the Oven

Cooking Bacon in the Oven from 101 Cooking For Two
Love bacon but hate the mess? Here's the foolproof, easiest, no mess way to have that most unhealthy of treats. Just slam it into the oven. Yep, cooking bacon is that simple and easy. Bake it. What a recipe... And you have been suffering for all these years.

Click to Read More and Get Recipe

Labels: , , , ,

Sunday, June 12, 2011

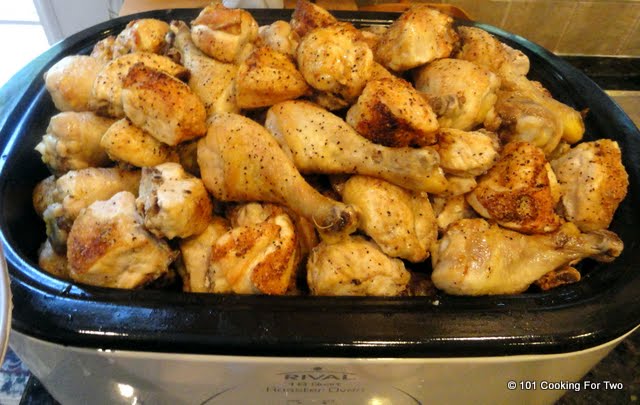
Chicken for a hundred

Ok, it is not Cooking For Two but still useful. This is something you can do and it really wasn't that hard. We were hosting a large retirement party for several family friends. It was a pot luck type affair but we felt we should provide a "main course" of meat. 

So my "what I wanted" list:
1) Not to make anyone sick. Any type of "mass cooking" can easily lead to food poisoning. Well, not at my house!
2) Not too much work. There was a lot of other things that needed attention also.
3) Had to have good taste and be able to be kept warm.

Click to Read More and Get Recipe

Labels: , , , , ,

Tuesday, February 15, 2011

How To Make Gravy - 101

Ahh gravy, the nectar of the gods according to one ATK episode I saw the other day. This seems to be hard for everyone (including me) except my wife. So I used my stealing of her pot roast recipe as an excuse to get a gravy lesson also. This is easy.

So this post is not a recipe but instructions about technique. Even if you don't use it, I will in the future so I'm posting it.

To start, read and understand the instructions BEFORE you start. You will not have time to read and do this at the same time.

Required equipment: Tupperware Quick Shaker, stove top pan with large bottom, a large slotted spoon or whisk

First
You need fluid from your meat with some fat in it. Here we have about 2 cups worth of liquid from our pot roast. We wanted more gravy so we added a can of beef broth. You could add soup base or bullion for more flavor. Also add salt to taste.

Second
The liquid needs to be in a stove top safe pan. Now over HIGH heat, bring the liquid to a hard boil.Turn on two burners if the pan will cover them.

Third
While the liquid is heating combine about equal amounts of AP flour and COLD water in your Tupperware Quick Shaker. For this day it was 1/2 cup each. That amount should be adjusted down to make smaller amounts. Shake vigorously and continuously. Get it all mixed together and keep shaking to prevent lumps.

Forth
VIGOROUSLY STIRRING while pouring the flour mixture in

Once you have the flour mixed and the liquid is at a HARD BOIL, slowly add the flour mixture to the area of hardest boil SLOWLY while VIGOROUSLY stirring with a slotted spoon or whisk. Pay attention to the thickness and stop adding the flour mixture when you get most to the consistency you want. It will thicken a little with the cooking in the next step.

Fifth
Continue to cook for another 1-2 minutes while still stirring continuously then remove from heat and serve immediately.

NOTES: The Tupperware Quick Shaker is almost mandatory in this technique. You can try whisking in a bowl but I don't think it will work as well. Can you say lumps. These are about $13 on Amazon, eBay, a Tupperware dealer or a mall kiosk near you. Google is your friend again.

Labels: ,

Tuesday, December 28, 2010

KitchenAid Pasta Attachment - A Review


Just call this a toy report. One of the cool things about having a Kitchen Aid stand mixer is all the associated toys. I had my eye on the pasta attachment for the last year. In fact, I think I got the mixer in someway aiming for this attachment. Well this year, it went on and off my Amazon wish list several times. I thought I left it off finally but in one of the trips on and off the list, one of my daughters went for it. So it was a complete surprise.

A few weeks ago Rex at Savory Reviews ran his through a first run with inspiring results. So we had left over Chicken Parmesan that my wife made (excellent with some pepperoni for allot of taste). A great time for a trial run on my day off.

I cut the recipe in half (we are cooking for two remember). The final result were very good but I had a stumble or two to mention in-spite of the hints Rex had. The dough was too dry. I initially went with the recipe provided by Kitchen Aid, but in the end, I needed an extra teaspoon of water to make the dough hold together through the roller. I though it was too dry when I did the hand kneading but left it. I added the extra water when I found the dough would not hold together through the roller. I think that cutting the recipe may have had something to do with this.  

Recipe
1 3/4 cup AP flour
2 large eggs
1/4 t salt
1 1/2 t water (plus 1 t that I think is needed)

Method

1) Combine all ingredients in the bowl and mix on 2 for 30 seconds.
Too Dry!!
2) Move to surface and knead for 2-3 minutes by hand to combine all dough.
3) Let set for 20 minutes.
Also too dry, I added a small amount of water here.
4) Divide in half  and flatten to about 1/8 inch by hand. Start with the roller set to 1. Your initial few passes with by raggedy. Keep folding the dough in half and reincorporating any separated dough.
5) After 4-5 passes you should have a sheet of dough. Now change the setting to 2 and do several passes. Continue to narrow the roller until you have the desired thickens. I went for 4 in thickness.
6) Now change to the desired cutter and make your pasta.
7) Cook for 2-5 minutes.

 Conclusions
A very nice toy. There is a small learning curve. I was very afraid of cleanup before I read the instructions. I imagined soaking the thing and have multiple parts to clean, NOPE, just wipe it off and let any stuck dough dry and then brush off. 

The results even here on my first try were better than a restaurant. Now that I have had my learning curve about the dough consistency, it will be much faster next time. With all my fumbling tonight, it was about 50 minutes until we were eating. Cut about 10 minutes off that for the learning curve thing. 


Labels: , , ,